

Rolling a joint: Step-by-step guide to rolling the perfect joint
Want to finally learn how to roll a joint properly? Then you've come to the right place. This article provides you with specific professional tips, practical instructions, and everything you need to know about rolling joints—without any unnecessary fuss.
Overview: What you can expect in this joint rolling guide
In the following sections, you will find everything you need to roll the perfect joint. Whether you are holding a rolling paper in your hand for the first time or want to refine your rolling technique, this guide covers both perspectives.
What you can expect:
- Quick step-by-step instructions for those in a hurry (directly in the next section)
- Detailed material science: papers, filters, grinders, and more
- Detailed explanation of each technique for rolling a joint
- Common mistakes and how to avoid them
- Legal basics in Germany since April 1, 2024
- Tips on tobacco, herbal blends, and pure joints
- FAQ with answers to the most frequently asked questions
This guide is intended exclusively for adults (18+) and does not constitute a recommendation to consume.
Want to get started right away? In the next section, you'll find concise step-by-step instructions—so you'll get the answer right away.
Your first joint: Quick step-by-step guide (for those in a hurry)
This section is your cheat sheet: just the most essential steps, clear and without lengthy explanations. Perfect if you want to roll a joint right now.
The order:
- Using a grinder: Place the cannabis in the grinder and grind it evenly.
- Shaping the filter tip: Fold the paper tips into a W or zigzag shape, then roll them up (approx. 5-8 mm diameter).
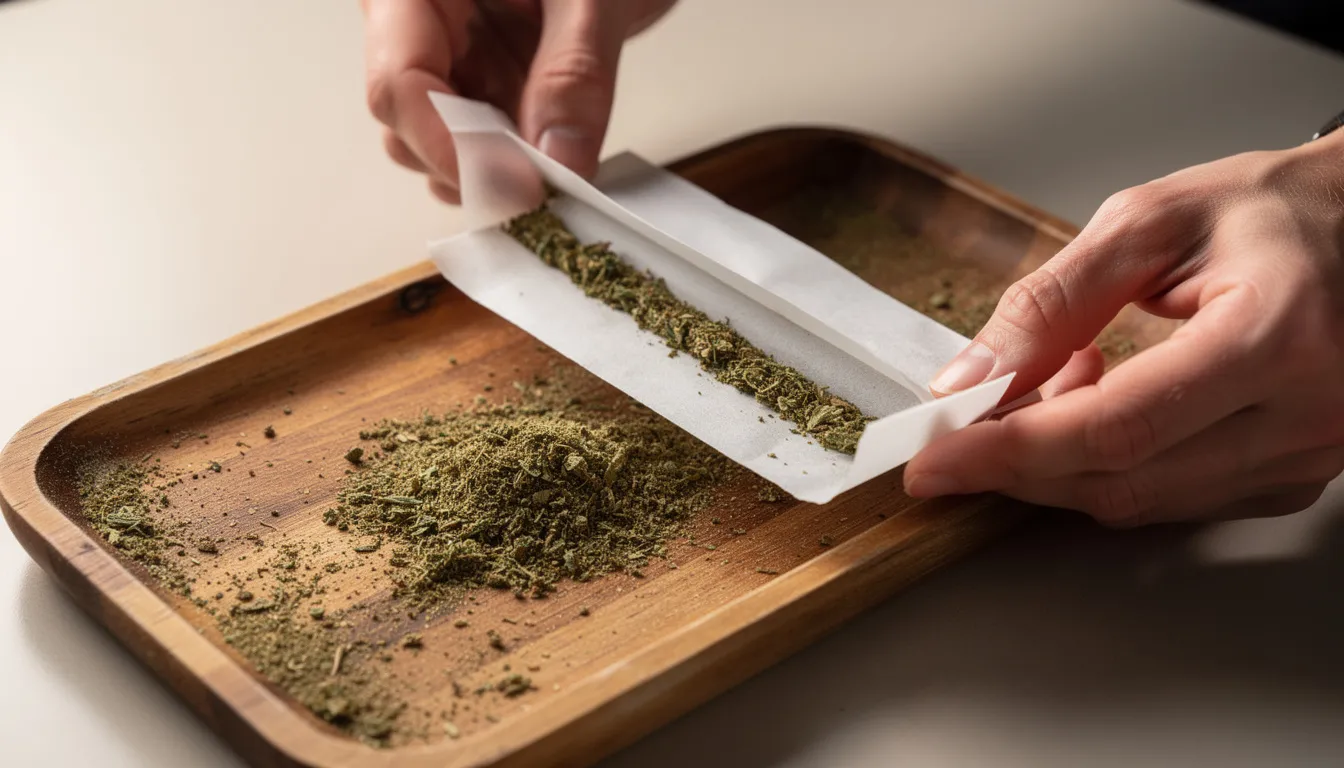
- Prepare the long paper: place the adhesive strip at the top and position the filter flush against one side.
- Spreading the weed: Spread approximately 0.4–0.7 g evenly on the paper, slightly less towards the filter.
- Pre-rolling: Move the paper back and forth with both thumbs and index fingers until you have a uniform sausage shape.
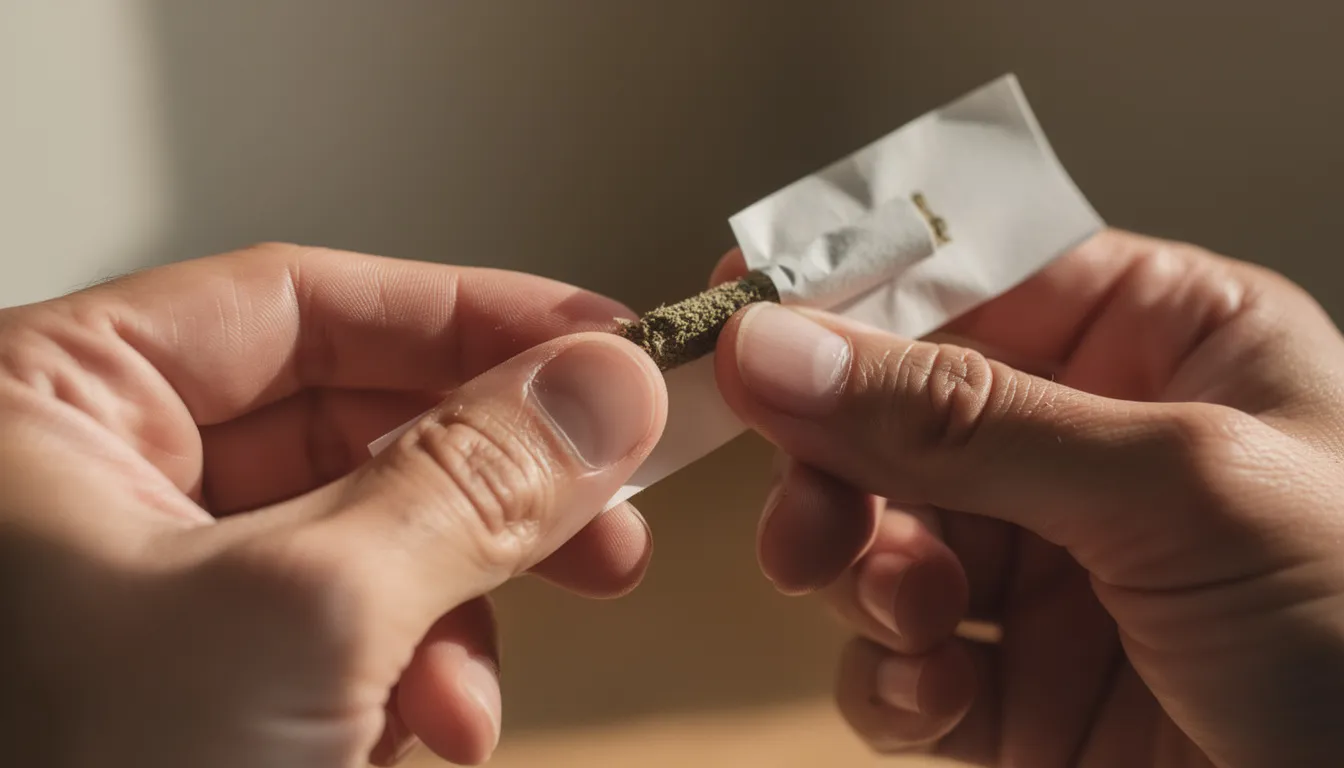
- Tuck & Roll: Slide the bottom edge of the paper under the grass, roll it up, briefly moisten the adhesive strip, and press firmly.
- Finish: Twist the tip closed, carefully compact the open end with a thin object (pencil, stopper).
That's it—your first joint is ready. Make sure everything is rolled evenly so that it burns evenly.
The following sections explain each of these steps in detail, show you typical mistakes, and give you tips for a better smoking experience.
Preparation: What you need to roll a joint
Good preparation accounts for about 80% of the result. If you have your tools ready to hand and know your materials, you can work faster, cleaner, and more relaxed.
Basic utensils:
- Long papers: King Size Slim (approx. 110 mm long) are standard for joints – e.g. from Gizeh or other manufacturers.
- Tips/Filters: Filter tips made of sturdy cardboard, ideally perforated for easy folding
- Grinder: 2-piece for beginners, 4-piece with sieve for kief collectors
- Rolling Tray: Construction base to prevent loss and maintain order
- Tamping tool: pen, toothpick, or special tamper for compacting
On the choice of cannabis:
- Indica-dominant flowers tend to have a more relaxing effect.
- Sativa-dominant strains tend to be more energizing.
- For beginners, medium quality is recommended for practicing turning.
Recommendation for beginners:
- Use thin, slow-burning rolling papers (less paper = less taste).
- Do not use flowers that are too moist—they are more difficult to process.
Prepare your workspace:
- Choose a well-lit, clean surface
- No drafts – otherwise the grass will fly off the tray
- Place everything within reach
Step by step: How to roll a joint explained in detail
Here, the quick guide from the beginning is explained slowly and in detail. Take your time to understand each step—practice makes perfect.
Step 1 – Chop up the grass
The right consistency is crucial for even burning:
- Target consistency: Fluffy, not powdery—similar to coarse tea
- Remove stems and seeds: These burn unevenly and taste unpleasant.
- Grinder vs. hand: The grinder delivers more consistent results, but hand grinding also works.
Step 2 – Roll the filter tip
The tip provides stability and prevents crumbs from getting into your mouth:
- Variants: Straight roll, W-fold, or M-fold
- Dimensions: Approx. 5–8 mm diameter, 2–3 cm length
- Technique: First fold the shape, then roll it up tightly so that the airflow is maintained.
Step 3 – Prepare the paper
Position the rotating paper correctly:
- Adhesive tape: Pointing upwards
- Filter: Insert flush on one side
- Choose shape: Straight (cylindrical) for beginners, cone (conical) for advanced users
Step 4 – Filling
Distributing the material evenly is half the battle:
- For straight shapes: Equal amount of material everywhere
- For cone shape: slightly more towards the open end
- Avoid common mistakes: No "mountain in the middle," no gaps
Step 5 – Rolling ("Tuck & Roll")
The real art of filming:
- Preforming: Roll the paper back and forth with your thumb and index finger.
- Objective: Form a compact, even sausage from the grass
- Tuck: Slide the bottom edge of the paper under the grass.
- Roll: Roll upwards, applying even pressure
Step 6 – Sealing
Using adhesive tape correctly:
- Moistening: Targeted and brief, do not soak
- Press down: evenly from the filter to the tip
- Important: Pay particular attention to the seal around the filter—air pockets often form here.
Step 7 – Finish
Finish the joint:
- Tip: Turn or press in slightly
- Compact: Carefully plug the open end with a thin object.
- Check: The finished joint should feel evenly firm.
Tip: Take your time when turning. With each experience, you will become faster and more precise.
Preparation in detail: Keep materials handy
Interruptions during rolling often result in crooked or loose joints. That's why you should have everything ready before you start.
What should be on the rolling tray:
- Grinder (already filled)
- Can of weed
- Paper pack
- Filter tips booklet
- lighter
- Small stuffing tool
Organization of the tray:
- Position papers sideways
- Grass at the top center
- Filter below
- How to minimize unnecessary hand movements
Filling & shaping: consistency is everything
Unevenly distributed material is the main cause of unevenly burning joints:
- Before rolling: Use your fingers to lightly spread and compact the grass.
- Thickness for beginners: Not extremely thick, more "medium" for a pleasant airflow
- Recommended practice: First practice making straight, cylindrical joints, then cones.
Tuck, Roll & Seal: Practicing the actual twisting technique
For many, the tuck moment is the biggest challenge:
- Tuck: Carefully slide the bottom edge of the paper under the grass without any material falling out.
- Pressure: Work evenly with your fingertips to avoid cavities.
- Common problems:
- Too tight = joint "clogged" (poor draw)
- Too loose = air pockets and uneven burning
Everyone had to start somewhere. By the tenth attempt, things will look very different—so don't worry if your first joints aren't perfect.
Material science: an overview of papers, filters, grinders, and more
Good accessories make rolling much easier and influence the taste when smoking. Here is a look at the most important materials.
Papers – Differences at a glance:
- Length: 1¼ (~78 mm) for smaller joints, King Size Slim (~110 mm) for standard joints
- Width and thickness: Narrower, thinner papers burn more slowly.
- Materials:
- Cellulose: inexpensive, easy to handle, burns faster
- Rice: Very thin, slow burning, may crack
- Hemp: Robust, natural flavor
- Bamboo: Sustainable, even burning behavior
Filters/Tips:
- Cardboard filters: Standard, inexpensive, versatile
- Activated carbon filters: Filter out harmful substances, slightly alter the taste
- Glass tips: Reusable, cooler smoke, somewhat impractical when rolling
Grinder:
- 2-piece: Simple, inexpensive, sufficient for occasional users
- 3-piece: With collection chamber for shredded flowers
- 4-piece: With sieve and kief compartment for advanced users – ideal if you want to use the material later in a modern herbal vaporizer such as the Relict or compact all-rounders such as the HAMMAH .
Useful helpers:
- Rolling tray for tidiness
- Tamping tool for uniform compaction
- Small scissors as an alternative to a grinder; those who prefer to vaporize will find suitable devices and accessories such as the Voity a selection of mobile vaporizers and accessories.
Papers in detail: size, thickness, and flavor
Choosing the right turning paper makes a noticeable difference:
- Standard papers (~0.3 inches): More suitable for cigarettes or very small joints
- Long papers (~100–110 mm): Standard for cannabis joints, about the length of a cigarette
- Thinner papers: Burn slower and have a more neutral taste, but are harder to handle.
- Bleached vs. unbleached: Bleached ones look neutral, unbleached ones look more natural (slightly brownish).
Filters & Tips: Comfort at the mouthpiece
A good filter stabilizes the mouthpiece and ensures a comfortable draw:
- Important: Traditional cigarette filters are unsuitable for cannabis—they filter out too much of the active ingredients.
- Cardboard tips: Flexible, inexpensive, no filter effect on active ingredients
- Activated carbon filters: Reduce pollutants, but also slightly alter the taste
- Folding pattern: W-folding prevents crumbs better than simple roll folding
Grinders & accessories: Clean work, better combustion
A grinder is almost indispensable for evenly ground material:
- Advantages: Uniform piece size, better burning behavior, less sticky fingers
- Materials:
- Plastic: inexpensive, less durable
- Aluminum: Standard, good value for money
- Steel/titanium: Very durable, higher price
- Wood: Visually appealing, functionally limited
- Collecting kief: Multi-part grinders with sieves collect the fine trichomes – which can be used separately later on.

Common beginner problems & troubleshooting
Joints that burn unevenly, burst, or become "clogged" are completely normal. Here you will find solutions to the most common problems when rolling.
Problem: Joint burns unevenly ("runs" or "paper runs")
- Causes: Unevenly filled, rolled too loosely or too tightly
- Solutions:
- Briefly moisten the slanted area with saliva.
- Re-shoot or re-stuff
- Spread more evenly next time
Problem: No train
- Causes: Rolled too tightly, grass too wet, clogged filter
- Solutions:
- Gently massage the joint between your fingers.
- Loosen up minimally
- Roll the next joint more loosely
Problem: Joint keeps going out
- Causes: Material too damp, too thinly packed, too much tobacco or herbs
- Solutions:
- Use more material
- Use drier grass
- Adjust mixture
Problem: Filter slips or falls out
- Causes: Tip fold too loose, not rolled up tightly enough
- Solutions:
- Roll up more tightly
- Use more stable folding (W or M)
- Make the tip slightly larger than the joint diameter.
5 practical tips to improve faster
- Start small: practice with smaller joints and cheaper papers until you've mastered the technique.
- Practice consistency: Always use the same finger position—muscle memory helps.
- Make a comparison: occasionally use pre-rolled cones to feel the difference compared to your own technique.
- Study sober: Don't practice under time pressure or while high—studying is more efficient when you're sober.
- Stay relaxed: mistakes are part of the process. Every pro started out rolling crooked joints.
Patience is your best friend. After 10–20 joints, you'll notice the difference.
Tobacco, herbal blend, or pure? Options in Germany
In Germany, tobacco is often traditionally mixed with cannabis. However, more and more smokers are switching to alternatives.
Spliff (with tobacco):
- Advantages: Easier draw, less cannabis required, more even burning
- Disadvantages: Nicotine, addictive potential, increased coughing, distinctive taste
Pure joint (cannabis only):
- Advantages: Pure taste, no nicotine addiction, authentic effect
- Disadvantages: More intense effect (observe dosage), more material required
Plant-based alternatives:
- Herbal mixtures without nicotine as a diluent
- Enable stretching without nicotine intake and are significantly better than tobacco, which has no place in a vaporizer.
- Examples: Damiana, raspberry leaves, mullein
The choice is individual. Consider health aspects and your personal consumption habits. There is no blanket recommendation.
Legal information, dosage, and responsible use (Germany)
The legal situation in Germany has changed with partial legalization as of April 1, 2024. Strict rules still apply, which you should be aware of.
Key figures (as of 2024):
- Possession of certain quantities permitted for adults (18+)
- Consumption prohibited for minors
- Special rules in public spaces (distance from schools, daycare centers, playgrounds)
- Home cultivation possible under certain conditions
Important: Laws can change. Always check the current status on official government websites.
Dosage for beginners:
- Start very low: 0.2–0.3 g per joint
- Wait for the effect (15–30 minutes)
- No refilling while intoxicated
Absolute no-gos:
- Never drive a car or operate machinery under the influence of cannabis.
- Driving license risks are real and serious
- Even small amounts can cause problems in traffic—regardless of whether you smoke traditionally or use a vaporizer instead of a joint.
This article does not constitute a recommendation to consume. It solely explains the technology and is intended for adults only.
Disclaimer & Health Notice
- No advice: This article does not provide medical, legal, or therapeutic advice.
- Health risks: Smoking generally poses risks to the lungs and cardiovascular system—even without tobacco; a comparison between vaporizers and joints shows the advantages of vaporization, but consumption is not completely risk-free.
- Reflective use: Conscious, occasional use instead of habitual consumption
- Professional help: If you have a history of mental illness or addiction, you should seek professional support.
FAQ: Frequently asked questions about rolling joints
How many grams should I put in my first joint? For beginners, 0.2–0.4 g is perfectly adequate. It's better to use less and wait for the effect.
Why isn't my paper sticking properly? The adhesive strip has either been moistened too much or too little. Moisten briefly and precisely, then press down immediately.
What should you do if the grass is very dry? Store dry grass briefly in a container with a piece of apple or a Boveda pack. Alternatively, roll it a little more moist and handle it more carefully. For vaporizers, choosing the right herbs and preparing them properly also plays an important role.
What to do if the grass is too damp? Allow the flowers to dry briefly before rolling them—spread them out on a plate at room temperature.
What is the best way to store rolled joints? Store them in an airtight container, such as a doob tube or small tin. This will keep them in shape and prevent them from drying out. If you want to quit smoking altogether, you can also look into how CBD and vaporizers can help you quit smoking.
Should I reuse filters? Not recommended. Hygiene and taste suffer as a result. Fresh paper tips are inexpensive and easy to make.
What is an inside-out joint? With an inside-out joint, the paper is turned inside out so that the adhesive strip is on the inside. After rolling, the excess paper is burned off, resulting in a joint with less paper and a purer taste. If you are generally interested in whether and why vaporizers are considered a healthier alternative, it is worth taking a look at the relevant comparative studies.
What is a cross joint or double joint? Advanced variants with multiple papers or a cross-shaped construction. Only try these once you have mastered the basics.
If you have any uncertainties regarding legal or health matters, you should always consult official bodies or doctors.
Conclusion: Learning to roll a joint is a matter of practice.
In the end, it all comes down to one thing: practice. Materials and technique are important, but routine is the decisive factor when rolling joints.
Crooked or loose joints at the beginning are completely normal and part of the learning process. Don't let this discourage you. With each joint, you will become more skilled and develop a feel for the right amount of pressure and moisture.
What you can do now:
- Try out different papers (hemp, rice, king size slim)
- Test different filter types (cardboard, activated carbon, glass)
- Find your own filming style
- Consume consciously and moderately
The art of rolling joints is not a science—it is a craft that becomes second nature with patience and experience. Keep at it, experiment with different methods, and remember: the journey is the destination.
Good luck with filming—and remember to be responsible with yourself and your consumption.